- COMPLIANCE HELP CENTER
- Getting started
- Preclearance
GETTING STARTED
Preclearance
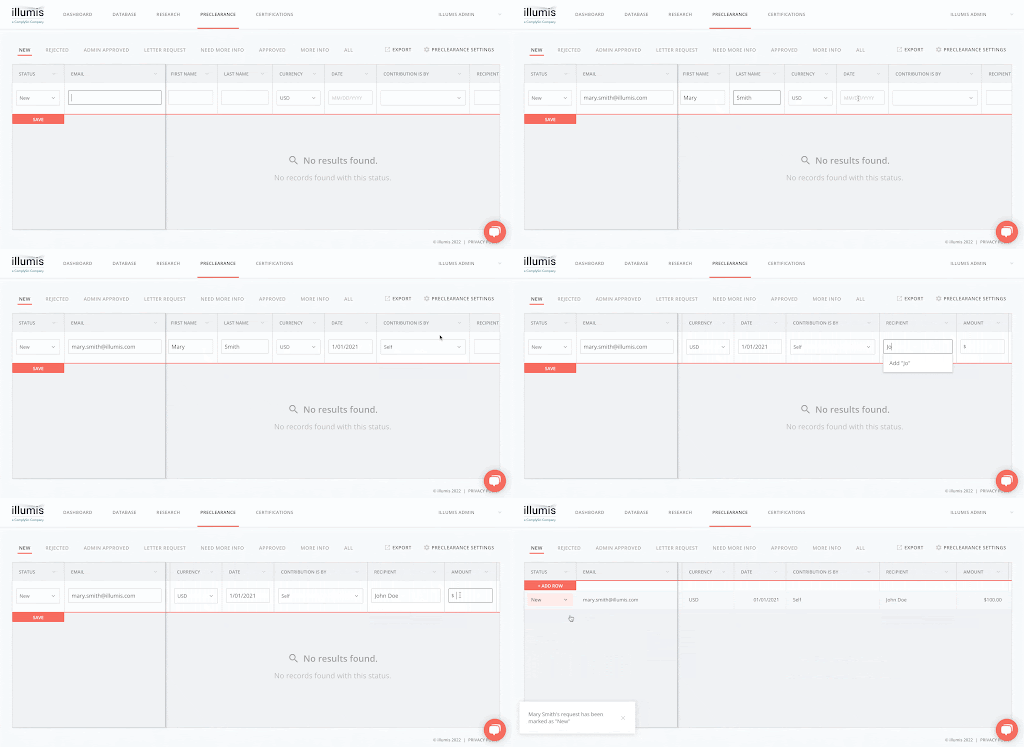
The integrated preclearance tool makes it easy to track and organize contribution requests from employees. The Preclearance Dashboard can be accessed by going to the Preclearance tab, and it is where you go to enter new preclearance requests and organize existing ones.
You can manually enter a new preclearance request record by selecting Add Row in the Dashboard table and filling out all the relevant information on the adjacent cells. To update the status of an individual preclearance request, select the Status drop-down menu for the record and choose your desired status there. You’ll be able to filter your preclearance records by these statuses by selecting any particular one where you see them arranged horizontally above the Dashboard table.
Turning on Automatic Matching in your Platform Settings (under your name in the top right of the screen) will allow the system to reconcile detected contribution records with Preclearance Requests. When a possible match is detected, the “Find Match” button under the Preclearance Request column in the Dashboard will turn orange and note that there is a potential match. You can review if the match is correct and select “Match” to match the request to the contribution record.
Preclearance Settings
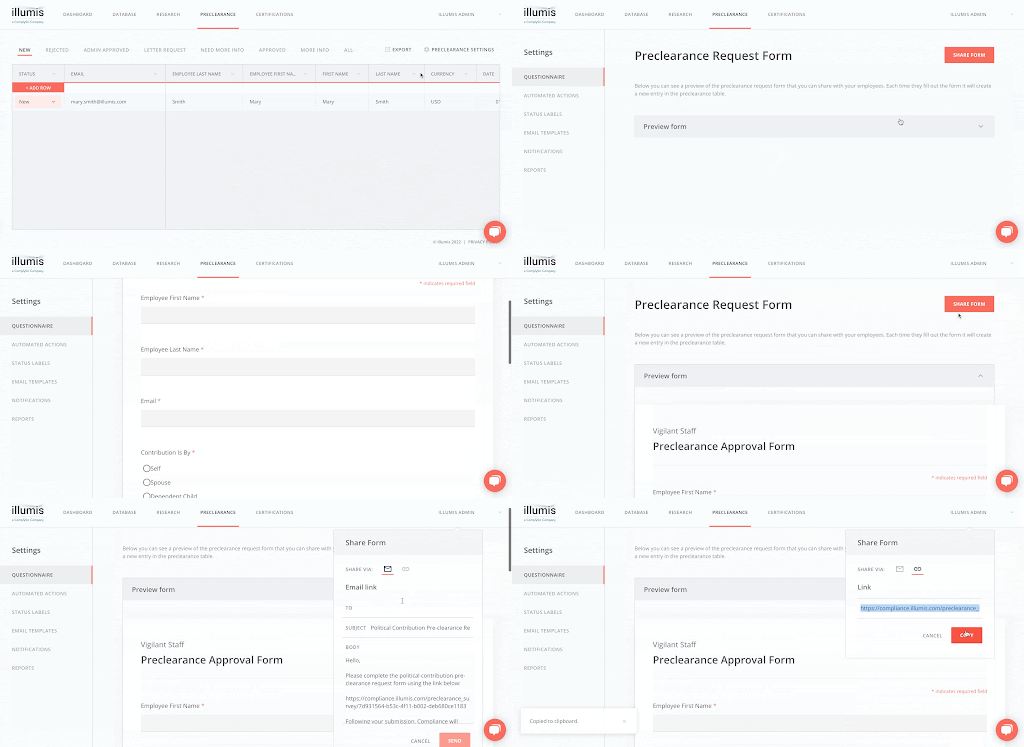
In Preclearance Settings (on the right in the Preclearance tab) you’re able to make adjustments to your preclearance workflow.
In Questionnaire you can see a preview of the preclearance request form that you can share with your employees. To share the form, select Share Form on the right, and choose whether you want to share the form via email, link, or embed code (to post to a website). Each time an employee fills out the form it will create a new entry in the preclearance Dashboard table.
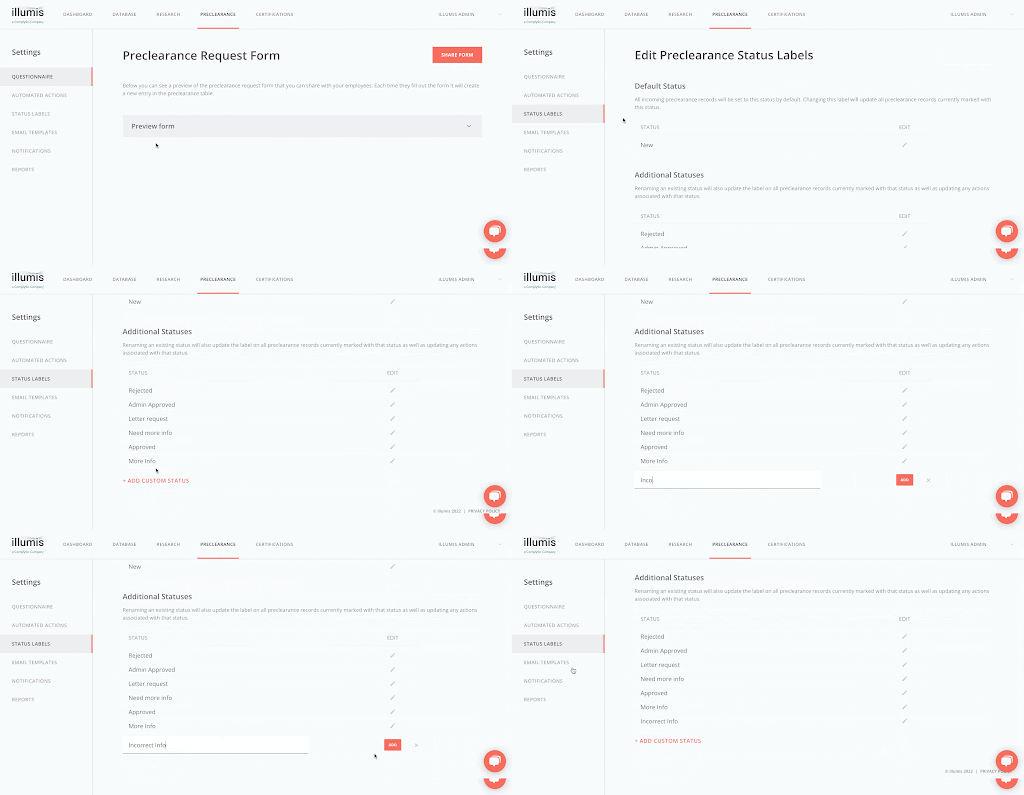
Automated Actions, Status Labels, and Email Templates are where you can set up customized workflows to send automated emails to your employees letting them know that the status of their preclearance request has changed. In Status Labels you’ll edit the existing status labels for preclearance contributions and create new ones by selecting Add Custom Status.
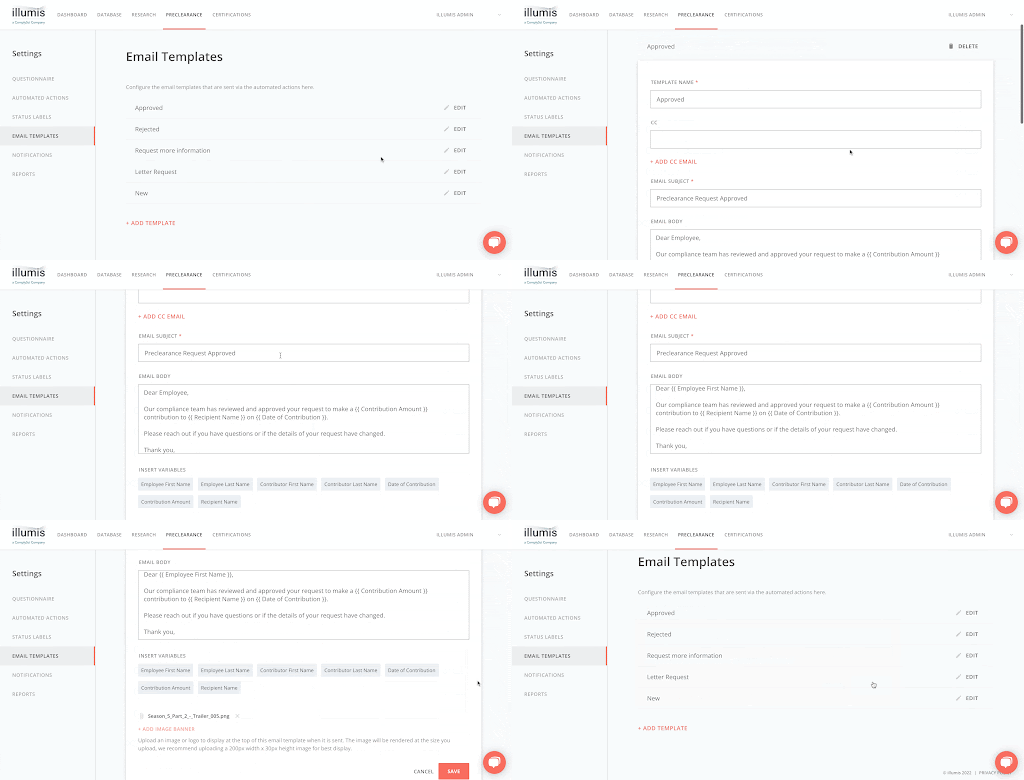
In Email Templates, you’ll edit the automated emails that will be sent to employees when you update their preclearance request record to a particular status. You can create new email templates as well. Each email template includes fields for the Name of the email, the Subject, and the Email Body. Under Insert Variables, you’ll be able to insert variables to show the relevant First Name or Contribution amount, so you can automate your process.
Automated Actions is where you can edit your automated preclearance process.
You can set specific email templates to send when different Status Labels are applied to a specific preclearance record. Under Automated Questionnaire Response you’ll edit the email template that gets sent when your preclearance questionnaire gets filled out.
You can also set particular Status Change Actions to affect records you match Preclearance requests to. You can add new Status Change Actions by selecting the Add Action button.

